

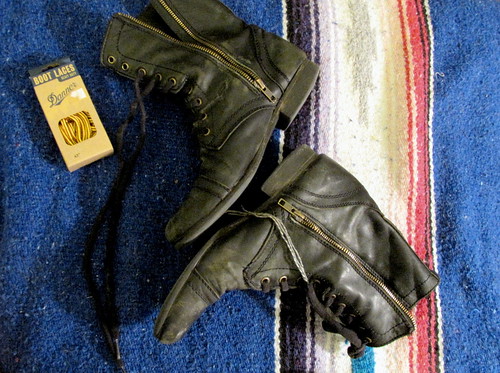
Okay, so studs are pretty popular now, from what I've noticed. Which is cool in my book, but sometimes too many studs can be a little overwhelming to me. My best friend, Christina, bought me these boots from Steve Madden two winters ago...and they are my favorite pair of boots I've ever owned! They've recently started to become really weathered, and the holes at the soles have become more of a nuisance. While re-soling is something I need to go to a professional for, I can add to the distressed look and refresh my boots with some STUDDIN'.
Doing both boots only took me 10 minutes. Not only is this easy and fast, but the outcome gives a refreshing makeover! I also added some new boot laces that I found at the thrift store.
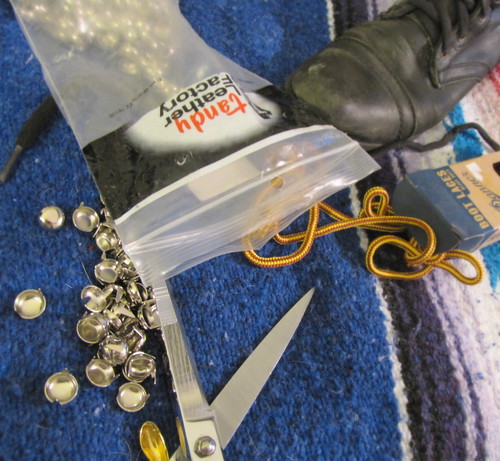
MATERIALS:
A bag of 2 prong studs. Mine are the rounded cones. You can google where to locally purchase your studs, or you can online shop on eBay, Etsy, or at Angry, Young, and Poor.
Scissors to make the holes - or a seam ripper will give you better control.
A hard surface to help you push in the prongs - I use a spool of thread or the end of my drafting table.
How to:
- I basically went into this project with no planning, so to start, I visualized where I wanted my studs and how many could fit in each row.
- I pressed the studs a little hard into the leather to mark the guidelines so I could know where I'm making a hole with my scissors.
- Slowly, I punctured holes into the leather with my scissors. Make sure you do not puncture too hard because then you'll end up with a HUGE slit and the prong will be too small for it.
No comments:
Post a Comment